Are you new to your Cricut and keep hearing words like attach, weld, weed, contour, and don’t know what they mean? In this Cricut dictionary, I’ll explain what each term means, how it applies to your Cricut, and help you learn how to use your machine!
If you’re frustrated with your machine check out these tips for learning your machine and must-have beginner tools.
Cricut Terms and What They Mean
Design Space – Design Space is the software you’ll use to create your projects and cut them out. This is where you’ll pick your fonts, images, colors, and edit everything. This software is free to use.
Cricut Access – Cricut Access is their subscription service that gives you access to over 90,000+ images, fonts, projects, and designs. This is a paid service.
Group/Ungroup – The group option groups images, text, and layers together on the canvas. Using group makes it easier to move things around and resize them together. This will not affect how images are laid out on the cutting mats. Ungroup a set of layers, images, or text so that they move and size independently from one another on the Canvas.
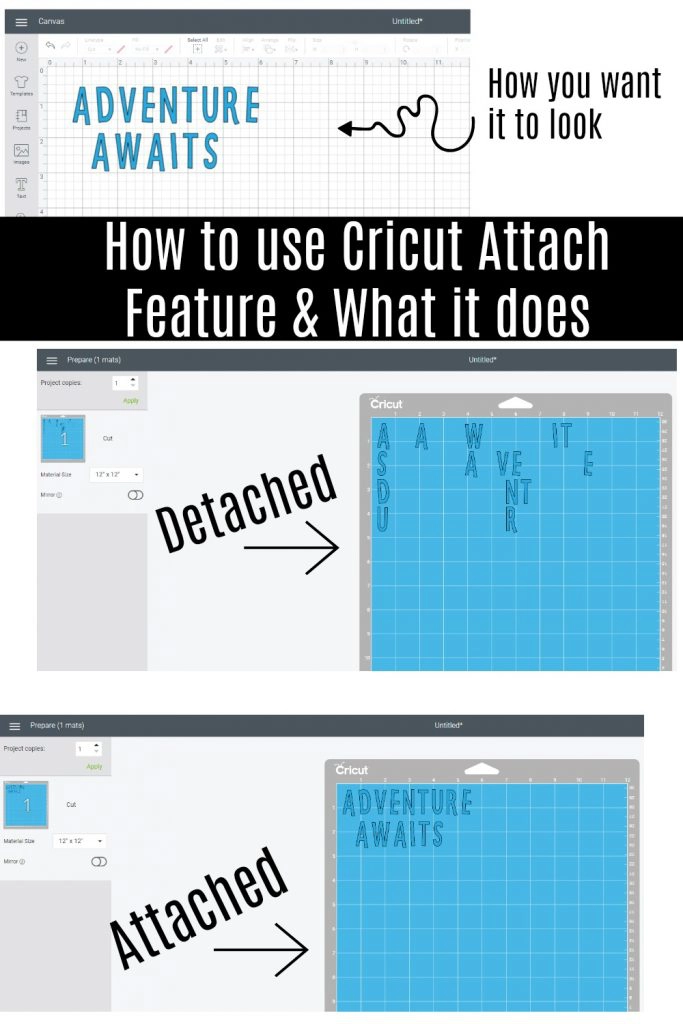
Attach/Detach – The attach tool has 2 functions in Design Space. Attach helps to hold your designs in the same arrangement on your mat as it shows on your canvas.
Attach also allows you to place writing/scoring lines to a cut layer. Example: You want to draw/write something and cut it out. Like a card.
Basically how Attach works is when you are done with your design and click MAKE IT if your project isn’t attached Design Space will move your project around to conserve space/material. This means everything could be spread out into a straight line. When you Attach it, it stays exactly how you see it on your Design Space canvas.
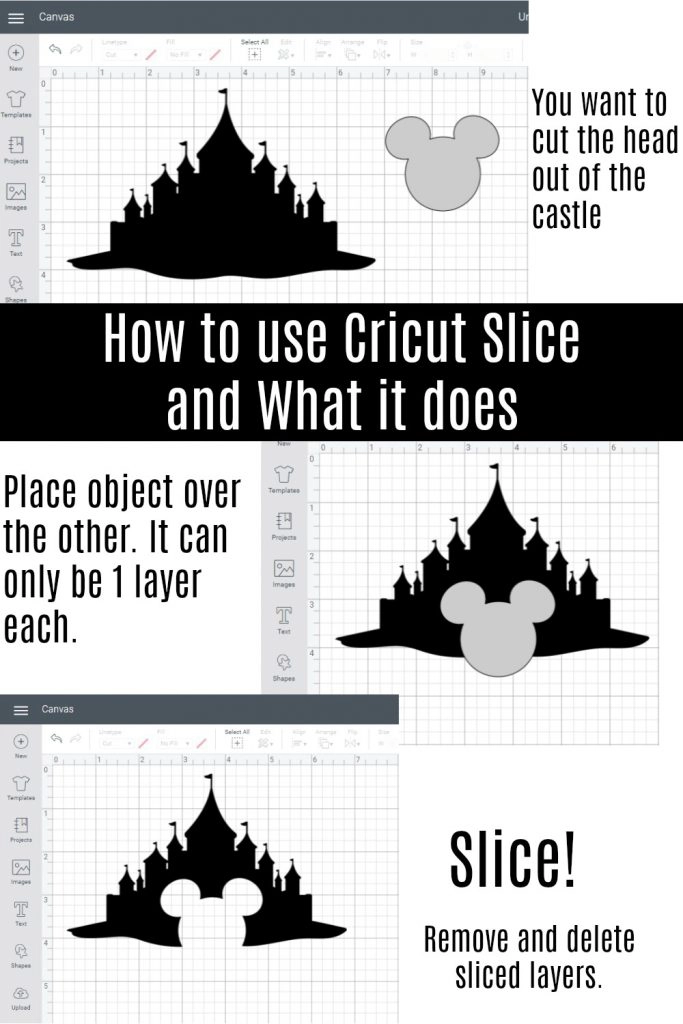
Slice – The Slice tool splits two overlapping images or text into different parts. You can use the Slice tool to cut out a shape from another shape, cut overlapping shapes from one another, or to cut text from a shape.
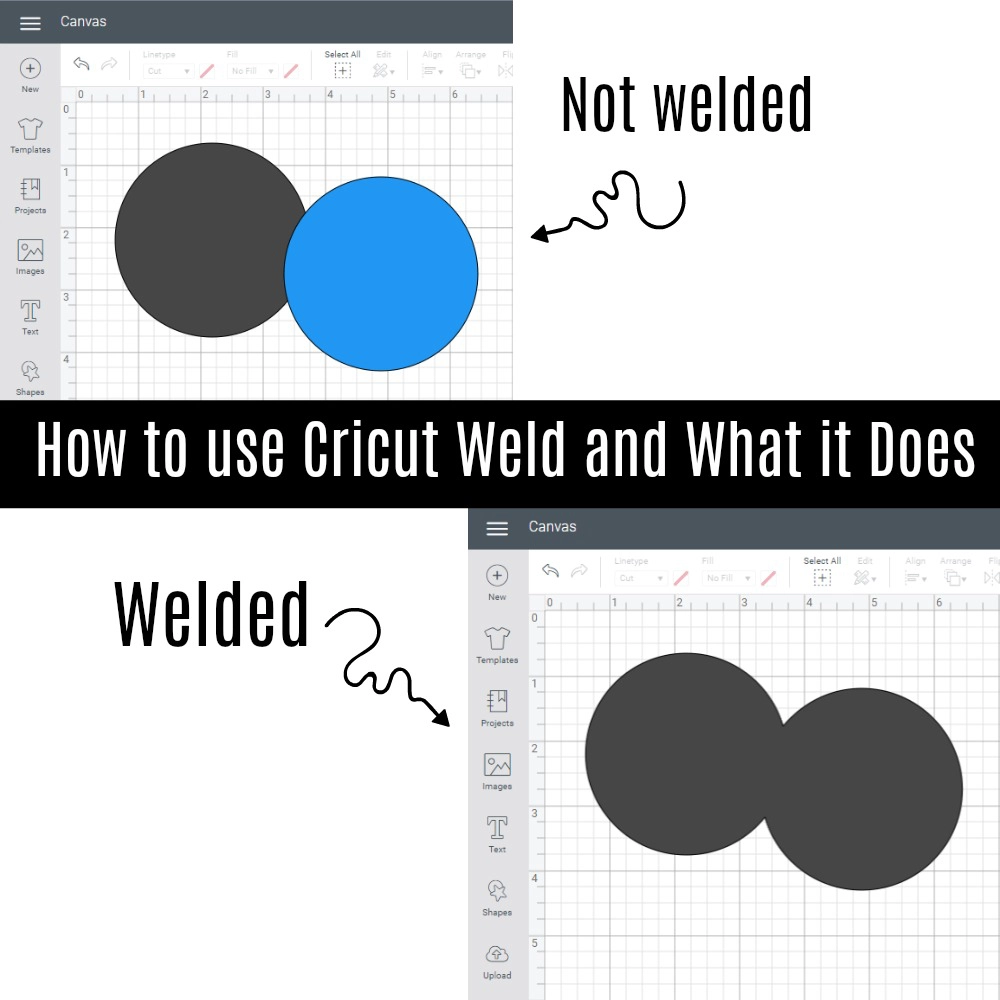
Weld – The Weld tool allows you to join shapes to create a single customized image by removing any overlapping cut lines. This can be a great way to simplify a design, keep the letters of a word connected, or combine shapes to create new designs.
You’ll need to use weld when using cursive or connecting fonts or when you want to combine images.
Flatten/Unflatten – Flatten turns any image into a printable image, merging all selected layers into a single layer.
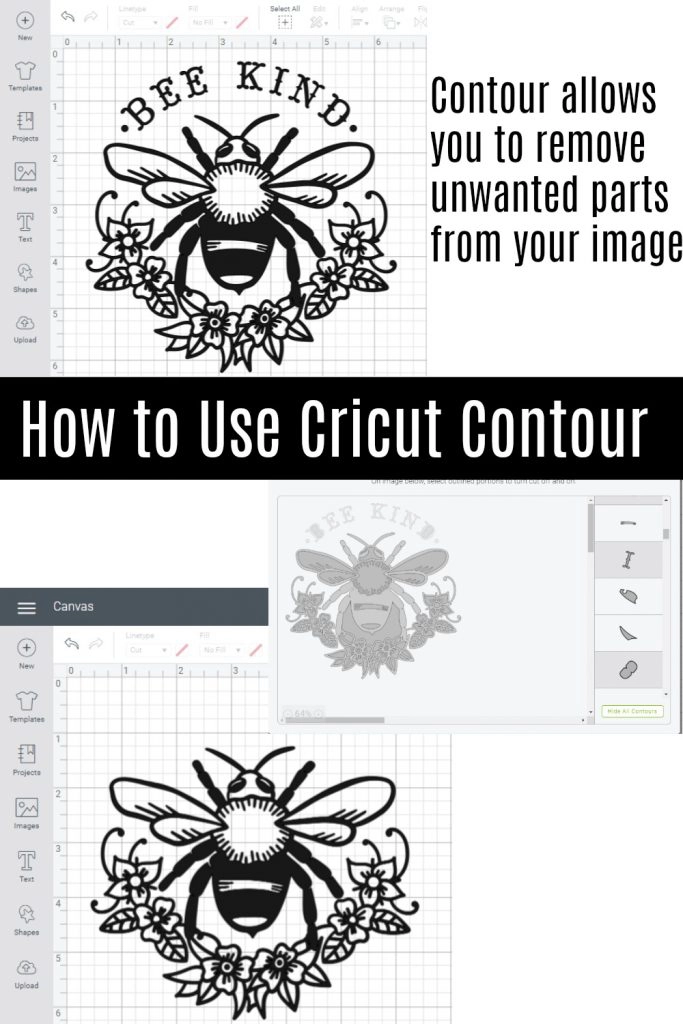
Contour – Hide or unhide contour lines or cut paths on a layer. If the image has multiple layers, you must first Ungroup in order to use Contour.
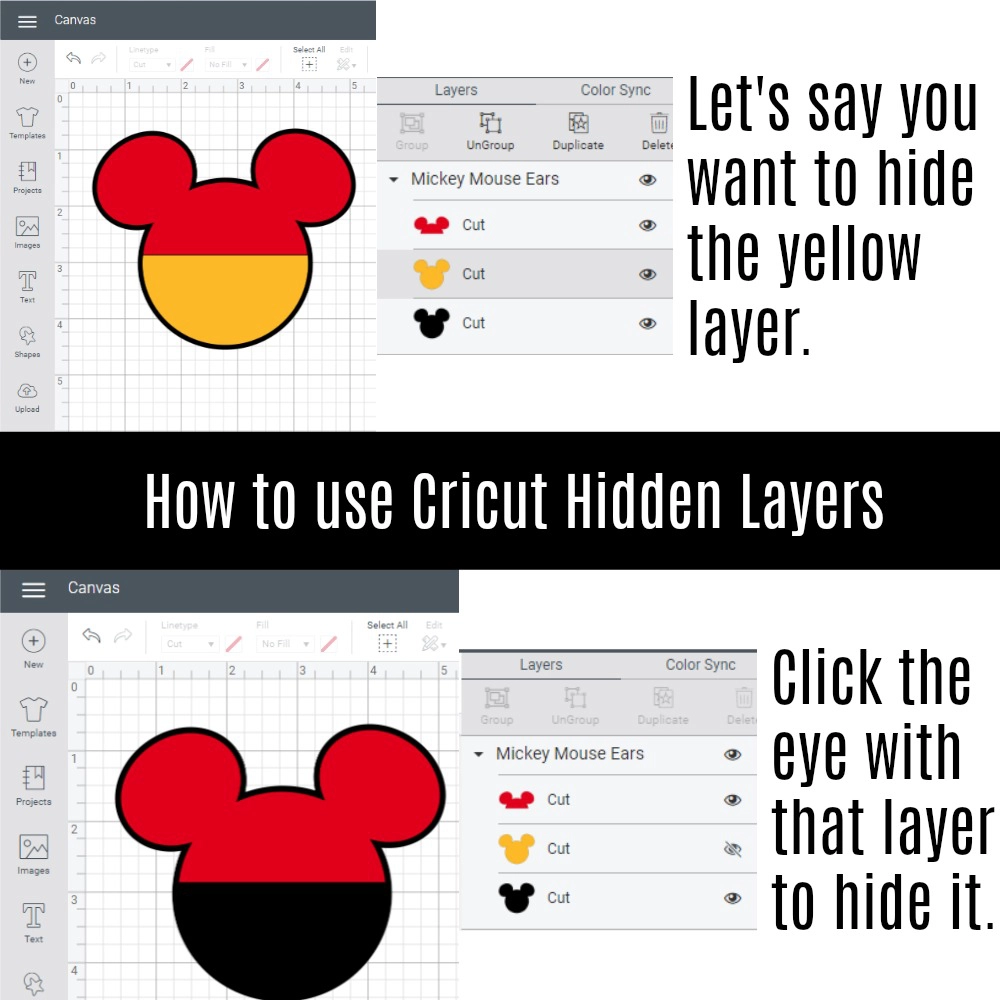
Visible/Hidden Layer – The open eyeball icon indicates that the layer is visible on the Canvas and will cut, draw, score, or print. Click the icon to hide the selected layer. Hidden layers will not cut, draw, score, or print. Clicking the icon again makes the layer visible on the design screen.
Mirror – Mirror is when you flip an image. Think about when you look in the mirror. It’s the same concept. You’ll need to mirror images when you’re working with HTV and you’ll need to do this every single time and with each cut mat, individually. You will also mirror when working with infusible inks and sometimes with adhesive vinyl. It will be rare with adhesive vinyl, but if you want to put an image on the backside of glass then you would mirror it. You’ll mirror your image when you get to the screen with your mats, before you cut it.
There are exceptions to mirroring HTV, like if you’re applying it to wood or a cup. Basically, you’ll mirror when your material is applied face down so that when it’s done and the carrier sheet is pulled away the image will be facing you. Printable vinyl doesn’t get mirrored, but always read the directions of the material you’re working with.
Iron-on or HTV – Cricut has its own heat transfer vinyl called Iron-On. If you choose to use other brands it will be called HTV. This is vinyl you’ll primarily use on fabrics like pillows, shirts, and bags. It can also be used on mugs, wood, metal and more. To use this vinyl you’ll need an iron, EasyPress, or Heatpress.
Permanent Vinyl or 651 or Adhesive Vinyl – Cricut called their Permanent Vinyl, Permanent Vinyl, but other brands call it 651. This is vinyl you’ll use for car decals, on mugs or cups, on outdoor items, for labels, and lots more. Permanent vinyl can be removed, but it can be hard and could damage the surface it’s on (like peeling paint off a wall). To use Permanent Vinyl you’ll need transfer tape.
Removable Vinyl or 631 – Removeable vinyl is used on walls, as labels, and much more. It’s meant for decals that you’ll want to take off easily at some point and don’t want to damage the surface. To use this you’ll need transfer tape.
Transfer Tape – Transfer tape allows you to apply Permanent or Removeable vinyl to your surface. Once your design is cut and weeded you’ll apply your transfer tape over it. To move your decal over evenly you’ll want to use transfer tape. You could apply your vinyl without it, but then it will be a mess. The transfer tape allows you to apply it exactly how it was cut out and in one piece, evenly.
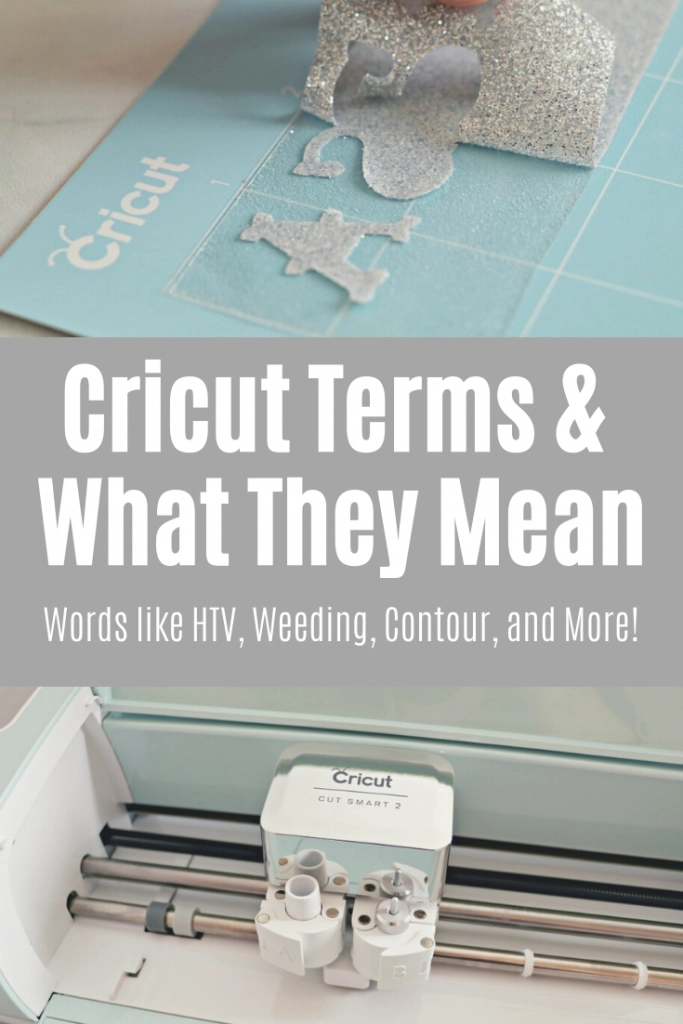
Weeding – Weeding in Cricut terms means to remove (or weed out) the parts of the design that you won’t be using. You will remove the excess vinyl (negative space) from your design after it has been cut so you can apply it to your project. This will be done with adhesive vinyl, heat transfer vinyl, and infusible ink. When you cut a design you will remove the excess vinyl that you don’t want in the design, this includes tiny pieces inside the design, large pieces around the design, and dead space in the design. To do this you’ll take your weeding tool of choice and pull the pieces of vinyl you won’t be using off the vinyl backing. This can be frustrating as a beginner so take things slow and watch some tutorials for tips and tricks.
Donna W
Wednesday 21st of February 2024
GREAT article, clearly explained. Thanks!