I love making personalized ornaments for the holidays. They’re cheap, easy, and double as gift tags. Here I’ll share with you a personalized acrylic ornaments tutorial.
Personalized ornaments are something I started doing last year. They’re super easy to make and they double as a gift tag that can then be hung on the tree as an ornament.
How to Make Personalized Acrylic Ornaments
Making personalized ornaments is similar to making Baby Milestone Rounds. The only difference is you will use an acrylic ornament blank. My favorite brand of acrylic blanks is UNIQOOO on Amazon, but you can use any acrylic blank that you like. I’ve even seen some locally at craft stores like Michaels.
Here’s what you’ll need:
- Acrylic Ornament Blank
- Permanent Adhesive Vinyl, I like metallic for this project
- Transfer Tape
- Acrylic Paint + Paint Brush (optional)
There are 2 ways to make these ornaments. You can paint the back of the ornament with the acrylic paint color of your choice or you can cut out a piece of vinyl in a brush stroke and apply that for a pop of color. This brush stroke bundle is really good to have on hand because it can also be used for keychains.
As far as acrylic ornaments go, you can use any shape, but my favorite shapes to use are the round and hexagon shapes.
How to Make Personalized Ornaments
Step 1 – Get Ornaments
Get your acrylic blank. Remove the plastic covering from it on both sides.
Step 2 – Paint or Vinyl Brush Stroke
Acrylic Paint Steps: If you are painting the back of the ornaments you will use your paintbrush to paint the back of the acrylic round. You can paint the whole circle or just the center. This is totally up to you and whatever look you are going for. Give it 1-2 coats depending on the look you want.
Vinyl Steps: Open Design Space > New Project > Load brush strokes designs or use ones in Design Space > Size them to a big smaller than your ornament size > Cut design out, make sure to mirror > Weed Design > Apply design with transfer tape to ornament.
Step 3 – Cut Out the Name
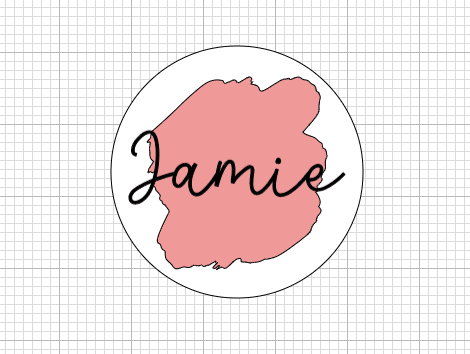
Pick a font you like and type out the name you are using in Design Space. I am using the font Sunshine Flower. Make sure to weld the name.
For projects like this, I like to make a circle the size of my ornament. Since my ornament is 3.5″ I make a circle that size and then I can use it to size my vinyl brush stroke and name. Delete the circle before cutting. Size your name to fit smaller than the 3.5″ ornament size. I sized my name to 3″.
Cut out your name, no need to mirror this one.
Step 4 – Weed Design
Weed your name. This is where you remove the unwanted vinyl from the design/name.
Step 5 – Apply Design
Use your transfer tape and apply it over the top of the name. Give it a good rub and remove the backing of the vinyl.
Apply the design to the top of your ornament, not the paint or vinyl side. Give it a good rub to make sure it is really stuck to the ornament and remove the transfer tape.
Step 6 – Add Ribbon
Add your ribbon and you’re all set!


YVONNE
Friday 6th of October 2023
So pretty, I love this.