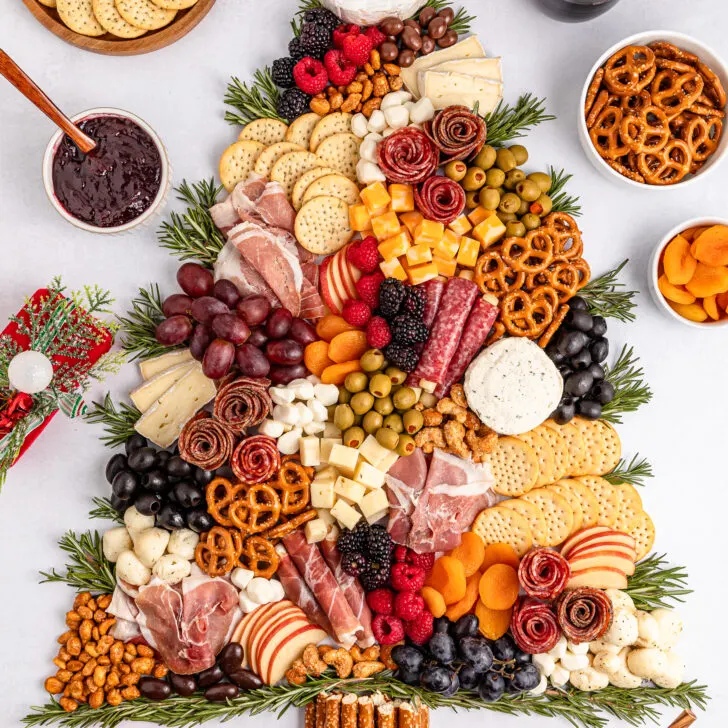
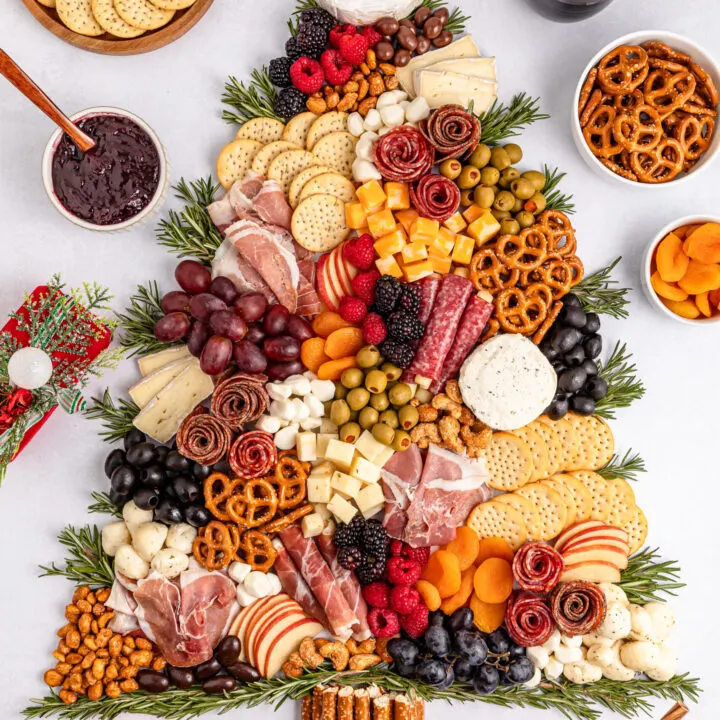
With the holidays right around the corner, entertaining and hosting family and friends will be on many people’s minds. And what better way to impress your guests than with a stunning tree charcuterie board?
Tree Charcuterie Board
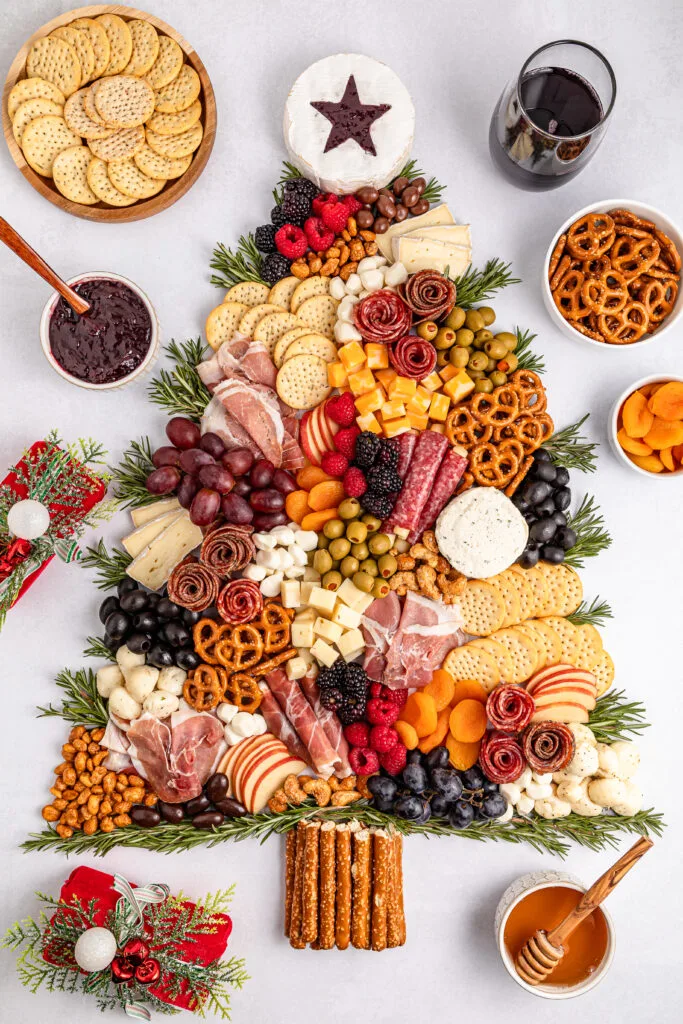
Charcuterie boards have been trending for years, but making it into a Christmas tree shape takes it to a whole new level. It is perfect for holiday parties, potlucks, or even as a centerpiece for your Christmas dinner.
A tree charcuterie board is all about blending flavors, colors, and textures. From savory meats to creamy cheese, sweet fruits, and crunchy nuts, every piece has its role to play.
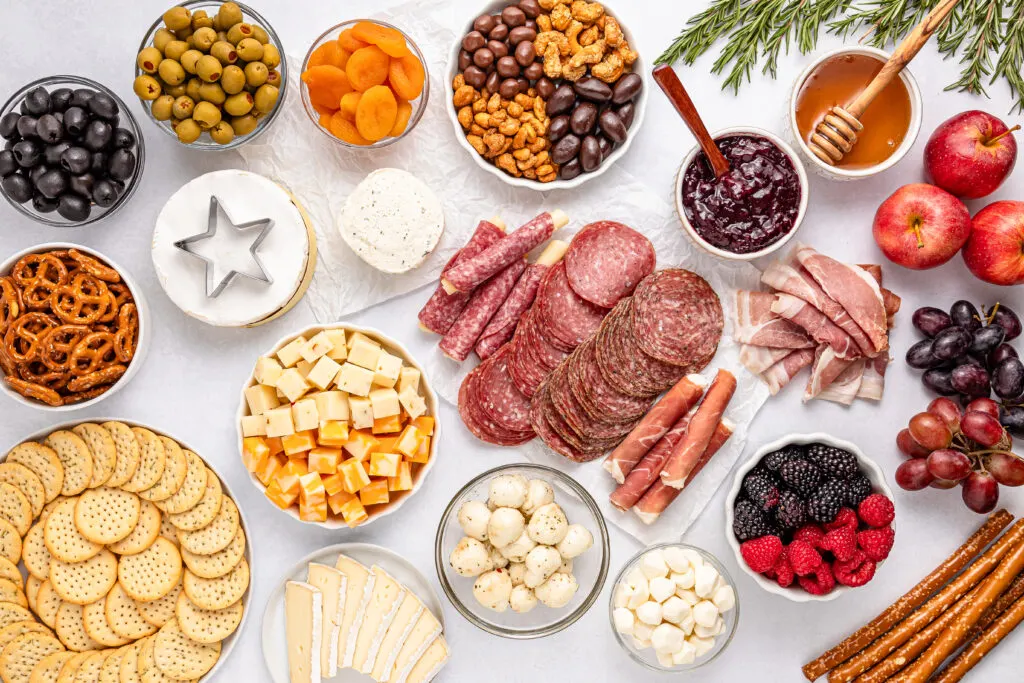
Ingredients You’ll Need
Meats:
- Sliced light Italian dry salami
- Sliced peppered salami
- Sliced prosciutto
- Salami wrapped mozzarella
- Prosciutto wrapped mozzarella
Cheeses:
- Brie cheese round
- Brie cheese wedge
- Boursin spreadable cheese
- Marinated fresh mozzarella balls
- Fresh mozzarella pearls
- Pepper Jack cheese
- Colby Jack cheese
Fruits & Sweet Additions:
- Apples (sliced)
- Fresh raspberries
- Fresh blackberries
- Red and black grapes
- Dried apricots
Savory Snacks & Crackers:
- Manzanilla olives (green olives)
- Black olives
- Assorted round crackers
- Pretzel mini twists
- Pretzel rods
Directions
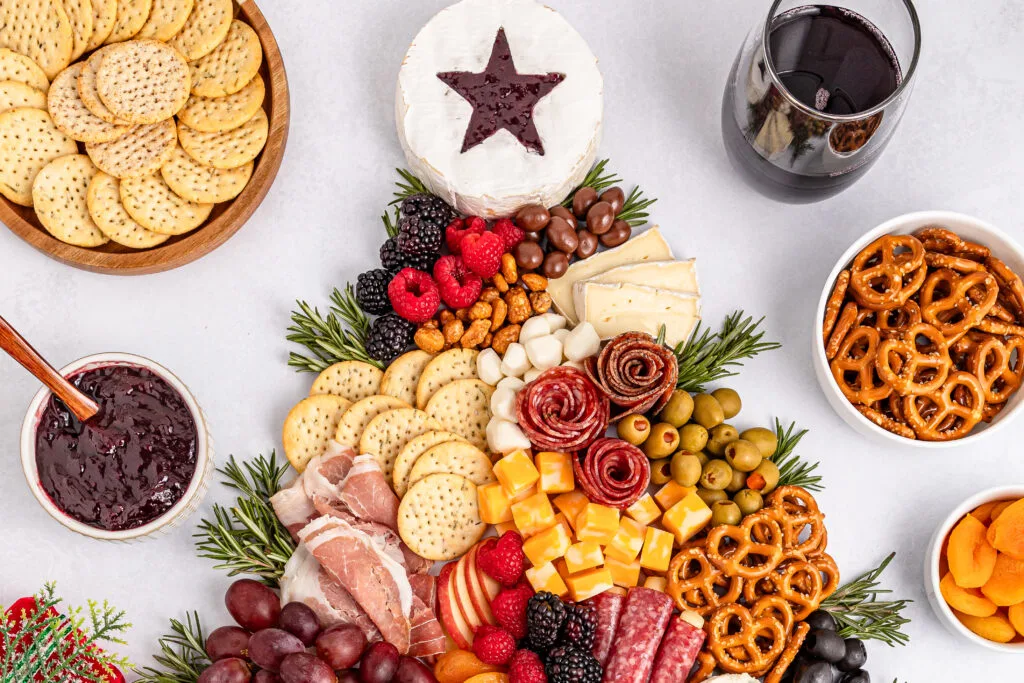
Start by cutting the pepper jack and colby jack cheeses into 1-inch cubes. Use a star-shaped cookie cutter to make a star out of the brie. Take out the star’s center and fill it with cranberry sauce, jam, or honey.
Next, cut the pretzel rods in half with a sharp knife. These will be the tree trunk.
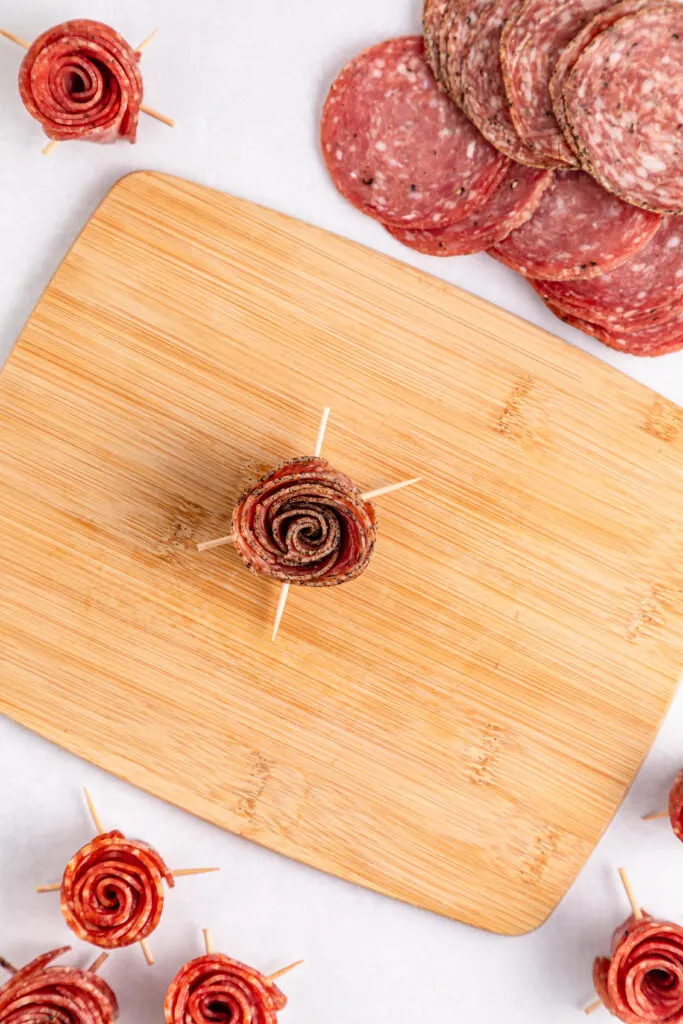
To make the salami roses, lay the slices of salami in a curved line and overlap them slightly. Roll them up to create a rose shape and secure the shape with a toothpick. You can make the roses bigger or smaller by using more or fewer slices of salami. Repeat this with the remaining salami slices.
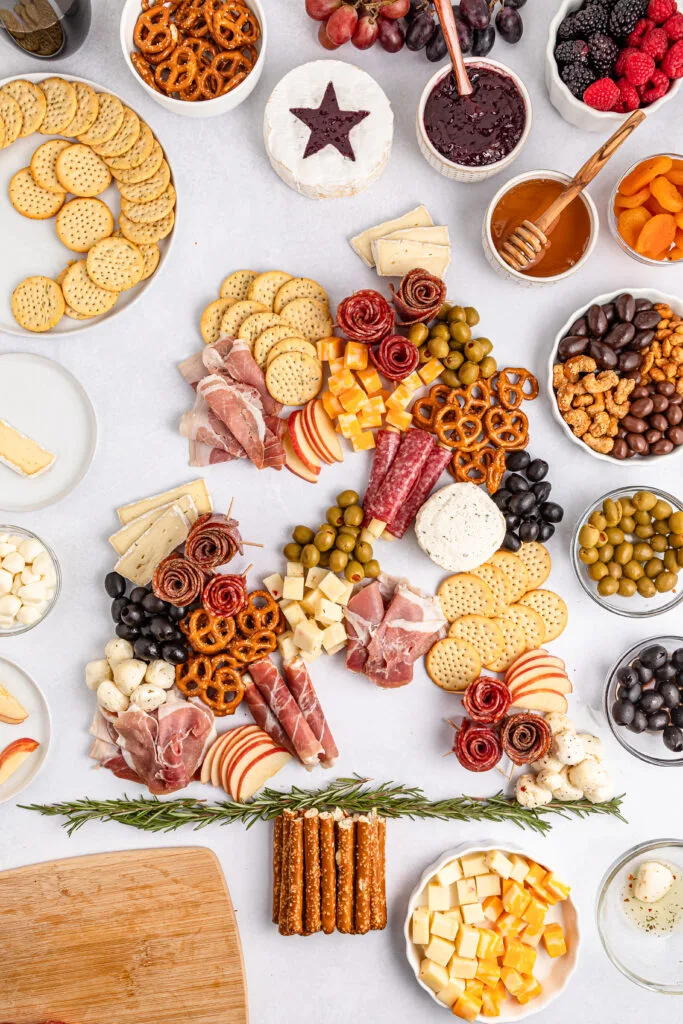
Once your cheese, pretzels, and salami roses are ready, lay a large piece of grazing paper on the table. Arrange fresh rosemary at the paper’s base to outline the tree’s bottom. Keep adjusting the rosemary as needed to form the tree shape. Stack the pretzel rods at the base to form the trunk, using food-safe twine to secure them if needed or just carefully stacking them. Place the brie star at the top of the tree to set the size and shape.
Spread the Boursin cheese and sliced meats across the tree in a zigzag pattern. Add crackers and pretzels in different spots around to start filling the board. Next, add the cubed cheese and slices of brie to cover any open areas. Place mozzarella balls and olives around the edges of the board.
Scatter fresh fruit into all the remaining spaces on the board. Fill any small gaps with nuts and dried fruit for extra texture and color. Adjust and add more of your ingredients until everything looks full and balanced, giving the tree a nice, even shape.
Finally, tuck more fresh herbs along the bottom or sides of the tree. Keep tweaking the arrangement until you like how it looks. Serve the board with some extra jam or honey on the side and enjoy!
Tips for a Perfect Presentation
- Play with Colors: Use vibrant ingredients like raspberries, rosemary, and grapes to add pops of color.
- Balance Flavors: Experiment with sweet, salty, and savory combinations. For instance, pair the creamy brie cheese with the sweetness of jam or dried apricots.
- Keep Portions Manageable: Slice meats and cheeses into small, easy-to-grab pieces.
- Work Symmetrically: To maintain the tree look, keep rows aligned and symmetrical as you layer up toward the top.
How to Store Your Tree Charcuterie Board
- Cover it: Use plastic wrap or aluminum foil to loosely cover the board, keeping everything in place.
- Refrigerate: Place the board in the fridge if you’re serving it later that day. For grazing tables, prep most ingredients but hold off assembling until closer to your event time.
- Freshen Up Before Serving: Add fresh herbs or more crackers shortly before serving to keep things crisp and vibrant.
Variations and Substitutions
Mix Up the Cheeses: Swap out the mozzarella or brie with aged cheddar, gouda, or blue cheese for a different flavor profile.
Add Meat: For a heartier option, include thinly sliced salami, prosciutto, or smoked ham.
Incorporate Veggies: Add vegetables like cherry tomatoes, cucumber slices, or carrot sticks for a fresh and healthy twist.
Sweeten It Up: Replace the savory elements with all sweet ingredients such as chocolate-covered fruit, cookies, and candies to create a dessert-inspired cheese board.
Make it Vegan: For a dairy-free option, use plant-based cheeses and omit the meats. Incorporate vegan-friendly dips and spreads for added flavor.
Christmas Tree Charcuterie Board
Easy Christmas Tree Charcuterie board with meats, cheese, fruits, crackers, and more.
Ingredients
- Sliced salami (Gallo Salame thin sliced light Italian dry salami, 7 ounce package)
- Sliced salami (Gallo Salame thin sliced peppered salami, 6 ounce package)
- Sliced prosciutto (Del Duca cured prosciutto, 6 ounce tray)
- Salami wrapped mozzarella (Fiorucci Hard Salami and Mozzarella Panino, 6 count)
- Prosciutto wrapped mozzarella (Formaggio Cheese Prosciutto and Mozzarella Wrap, 7 count)
- Brie cheese round (President Brie soft-ripened cheese, 8 ounce round)
- Brie cheese wedge (President Brie cheese, 7 ounce triangle wedge)
- Boursin spreadable cheese (Boursin garlic & herb cheese puck, 5.2 ounce)
- Marinated fresh mozzarella balls (Great Value, 12 ounce tub)
- Fresh mozzarella pearls (Belgioso mini snacking cheese pearls, 8 ounce tub)
- 8 ounce block Pepper Jack cheese, cut into 1-inch cubes
- 8 ounce block Colby Jack cheese, cut into 1-inch cubes
- 10 ounce jar stuffed manzanilla olives
- 6 ounce can pitted medium black olives
- 1-2 apples, cored and sliced
- Fresh raspberries
- Fresh blackberries
- Dried apricots
- Red and black grapes
- Assorted round crackers (Toasteds Variety Pack, 12 ounce box)
- Assorted tray of sweet nuts and chocolate covered nuts
- 3 cups pretzel mini twists
- 12 pretzel rods, cut in half, for the tree trunk
- 1 cup mixed berry jam, for filling the brie cheese round
- 1 cup honey, for drizzling over cheese
- Fresh rosemary, for decorating the wreath
Instructions
- Prepare the cheese. Cut the pepper jack and colby jack blocks into 1-inch cubes. Use a star cookie cutter to make a star shape in the brie cheese. Remove the center of the star and then fill with cranberry sauce, jam, or honey.
- Use a sharp knife to cut the pretzel rods in half. These will be used for the tree trunk.
- Prepare the salami roses. Layer the salami into a curved line and fan it out. Roll it and then use a toothpick to keep it together. Make the roses big or small by rolling different amounts of slices. Repeat with the remaining salami.
- Once the cheese, pretzel, and salami roses are prepared, lay down a large sheet of grazing table paper. Then make an outline of the bottom of the tree with the fresh rosemary. You can continue to adjust the tree as you go along. Stack the pretzels underneath to make the trunk. You can use a food safe twine to hold it together if desired or just carefully stack them. Place the brie round at the very top where the star would go. This will give you an idea of how big you want the tree to be.
- Add the Boursin cheese spread and sliced meats to the board. I like to space them all out and put them on opposite ends, just zigzagging them down the tree.
- Add the crackers and pretzels around the board in different places.
- Add the cubed cheese and sliced brie, just slowly starting to fill up the open spaces.
- Add some mozzarella balls and olives around the edges.
- Start adding fresh fruit to the remaining open areas and then fill the gaps with nuts and dried fruit.
- Adjust and top the sections off with more ingredients if needed to make it look fuller and to even out the tree.
- Add more herbs on the bottom and insert some off to the sides. Continue to adjust until it looks just right!
- Serve with some extra jam and honey. Enjoy!
