Are you making the switch from a Silhouette Cameo to a Cricut and want to know how to use your Silhouette Design Store files on your Cricut Explore Air 2 or another Cricut machine? Look no further because I am here to show you how!
Several months ago I made the switch from my Silhouette Cameo 3 to a Cricut Explore Air 2. I had my Silhouette Cameo 3 for a few years and during that time I purchased a lot of Silhouette Design Store files because I had their subscription plan. You don’t need a subscription to purchase their files, you can head to https://www.silhouettedesignstore.com/ and buy files, but if you plan on purchasing a lot of files a plan might be a good option since you get a lot more files vs just buying them individually.
The Silhouette subscription is credit-based and you can buy different amounts. The bottom plan is $4.99/mo and with that, you get $10 per month in Design Store credits. Most files are around $0.99 with fonts being more money, but they’re constantly having sales so if you time it right you can really stretch your subscription credits into a lot more files. The credits roll over 60 days and then you lose them, so you don’t have to use them the first month you get them, but if you don’t use that month’s credits within 60 days you will lose those credits. Ex: I get Credits in Dec. If I don’t use them by my reload date in Feb, I would lose the credits for Dec.
The plan I had with Silhouette is for a year and I still have time left on it, so each month when my credits reload I head to the store and pick out some new fonts and files. Using them with the Cricut Design Space is really simple!
How to Use Silhouette Design Stores Files with Cricut Design Space
First, you’ll head to https://www.silhouettedesignstore.com/
You’ll need to create a free account.
Browse through the files and find some you like. Add them to your cart.
When your items are in your cart make sure you hit the “Include all SVG” button. You will need the SVG file for Cricut Design Space.
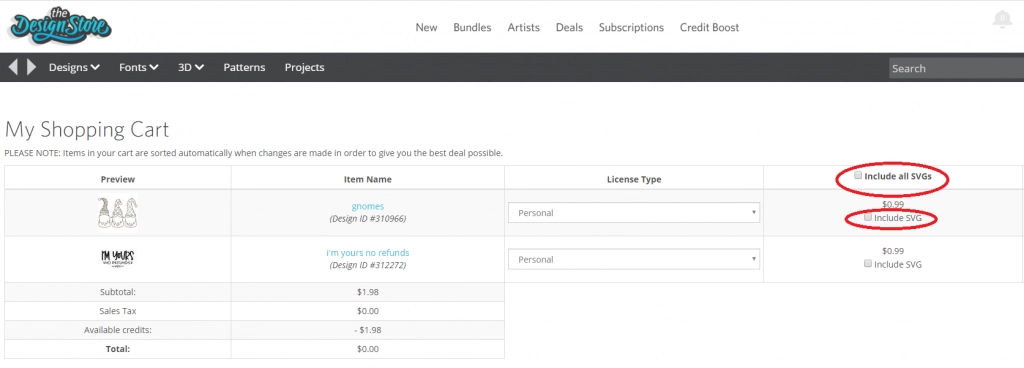
Pay for your files and when it takes you to the confirmation screen hit the big blue button that says “Direct Download”.
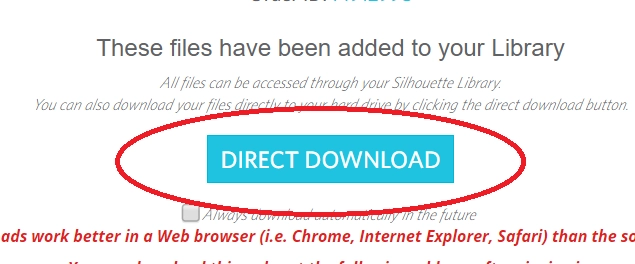
Open that file. I copy the files and paste them into a SVG folder I made on my desktop.
Once your files are downloaded you’re going to open Cricut Design Space and create a new project.
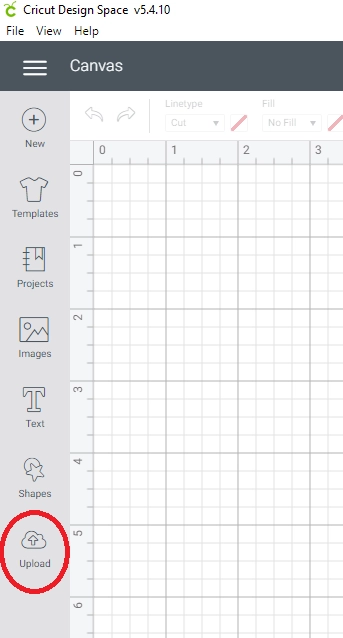
When your blank, new project opens hit the Upload button on the bottom left side.
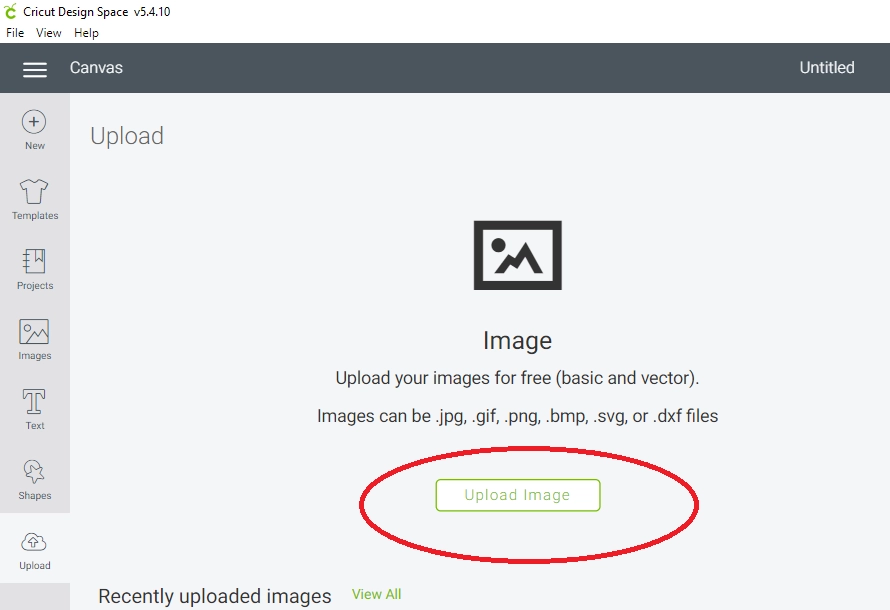
Hit the upload image button and find the SVG file you want to upload.
When you upload the image you might get an error that says it’s not able to import text elements. Hit continue.
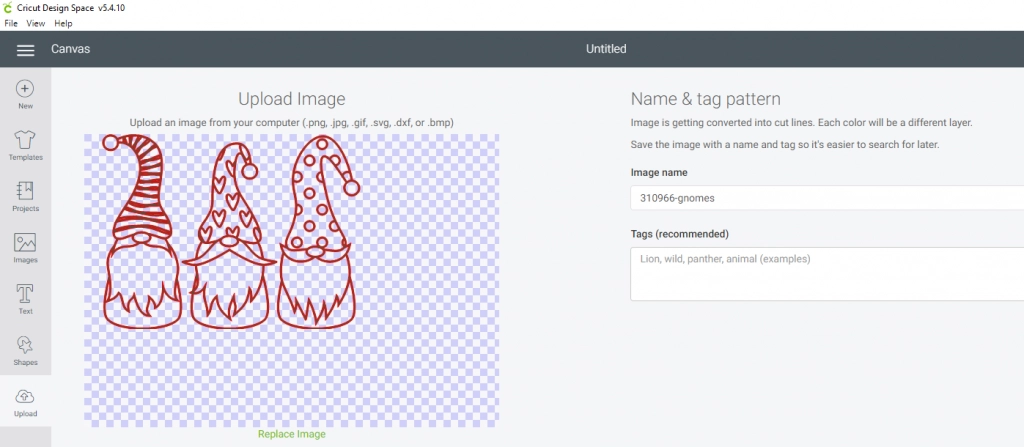
You’ll be taken to the image and there you can change the file name if you want. Once you are done, hit save.
Now your file will show under your recently uploaded files.
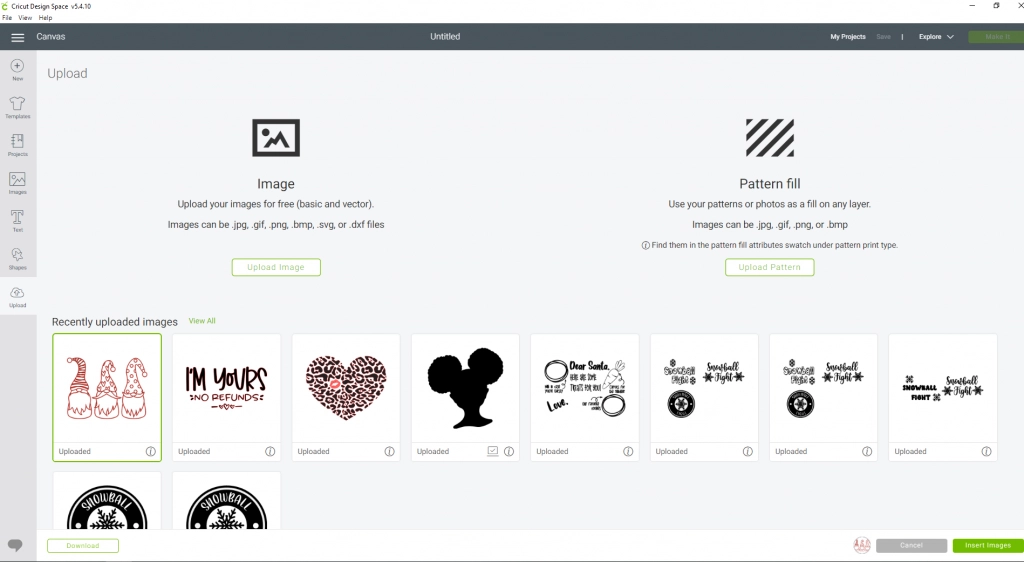
Click your file and then hit the insert image button.
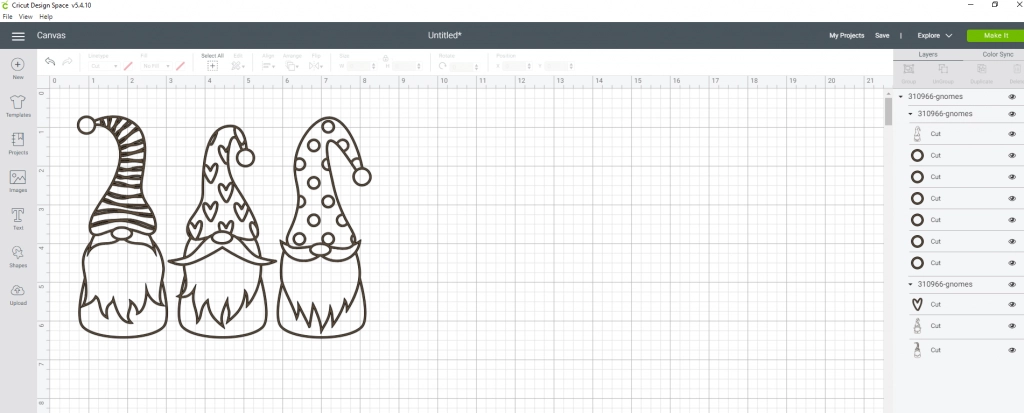
Now your file will load into Cricut Design Space and you can cut it out with your Cricut machine!
How to Use a Silhouette Font with Cricut Design Space
If you buy fonts from the Silhouette store you would follow the same purchasing steps as you did the file. Pick it out > Add to Cart > Purchase > Download. Once the file has downloaded you’ll open it up and install the font to your computer. When you open Design Space the font will automatically show when you go to create text. Text > Font Drop Down > either All or System.
How to Install a Font on Your Computer
Download the Font
Open the Zip File
Click the Font Name File (this will either be TrueType or OpenType)
Double Click the Font File, it will have a white square next to it with a very small blue A.
This will pull up a screen with the fonts writing all over it. Hit INSTALL at the top of the screen.
Restart any programs, if they’re open, (like Design Space) for it to pick up your new font.

